Fiberglass Repairs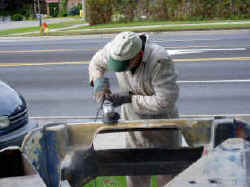
After the paint was stripped, the full extent of the fiberglass repairs
required became evident, there was normal wear and tear plus a fair bit of
hidden damage as a result of accidents and abuse, some poor repairs that needed
to be undone, and the usual shoddy factory workmanship.
DON'T STRIP A EUROPA, SAND IT!!! Methylene chloride strippers will
soften and damage the gelcoat, creating
gouges and irregularities that will require filler, and if you remove the
gelocat, as I did, your bodyman will find plenty of pinholes to fill.
54/1871 was treated to a complete skimcoat of filler and block sanding.
Live and learn. And pay.
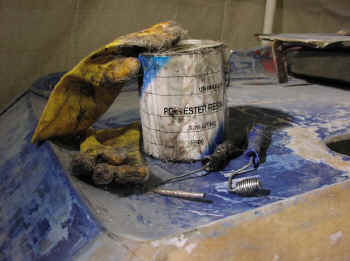
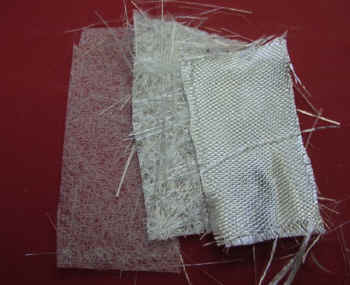
I used only polyester resin and 1 or 1.5 oz mat, 4 or 6 oz cloth and
finishing veil. I
minimized the use of cloth as I had been warned against 'proper' laminating techniques where the resultant
stiffness might cause future cracking, but in the end many areas received
properly lamina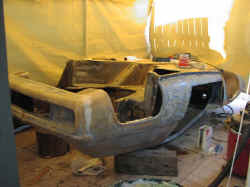 ted
repairs. In retrospect, I think that using just mat in certain areas (as
had the factory) was wrongheaded, you just have to be careful to avoid hard
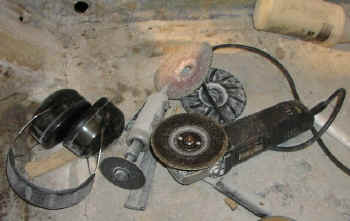
spots where flexing can concentrate. I would estimate about 100 hrs were spent
on glass work. I lost count.
ted
repairs. In retrospect, I think that using just mat in certain areas (as
had the factory) was wrongheaded, you just have to be careful to avoid hard
spots where flexing can concentrate. I would estimate about 100 hrs were spent
on glass work. I lost count.
Best friend Mark
was a huge help with this project as he seems to be with all of them. Here
he's glassing where we removed the front flange on the underbody. Two guys can easily carry the body shell around,
and turn it
over. It is MUCH easier to do most repairs with the body shell
inverted.
I fixed (meaning there was damage or a fatigue) the: (take a
deep breath...) Rear bumper area, rear valence, cracks in ear of rear inner fenders,
major voids in same, failed joint in front of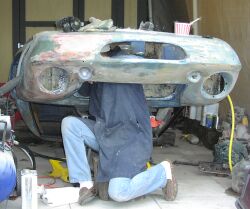 same, cracked rocker,
cracked area under gas tank, crushed bottom of where the other tank would go (someone tried to jack it there) bad repair of shelf that
sits on the chassis Y (2 failures, major rebuild, seat track holes, bad hole cut
in engine bay to clear TC air filters, torn out holes in engine bay, torn out holes in front trunk, really weird and amateurish factory
patch in door opening forward of lower door post bobbin, voids in rad
mounting flange, voids in both front inner fenders, cracked flange in front trunk, 5 places around the snout, crumbly headlight mounting
flange, shattered LF fender (major job, removed old repair first), crack in roof,
door, and crunched rear bumper corner bulge where the car
landed when attempting suicide, crack in middle of lower door sill, doors in a
variety of areas. I have also reinforced all fender lips, inner fenders, and most of
the areas areas where the upper and lower halves were attached - many of these areas were cracked, see above.
same, cracked rocker,
cracked area under gas tank, crushed bottom of where the other tank would go (someone tried to jack it there) bad repair of shelf that
sits on the chassis Y (2 failures, major rebuild, seat track holes, bad hole cut
in engine bay to clear TC air filters, torn out holes in engine bay, torn out holes in front trunk, really weird and amateurish factory
patch in door opening forward of lower door post bobbin, voids in rad
mounting flange, voids in both front inner fenders, cracked flange in front trunk, 5 places around the snout, crumbly headlight mounting
flange, shattered LF fender (major job, removed old repair first), crack in roof,
door, and crunched rear bumper corner bulge where the car
landed when attempting suicide, crack in middle of lower door sill, doors in a
variety of areas. I have also reinforced all fender lips, inner fenders, and most of
the areas areas where the upper and lower halves were attached - many of these areas were cracked, see above. 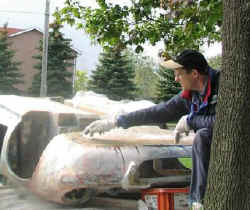
I also removed, glassed and filled the front and rear underbody flanges, and glued and filled and flattened the below-the door sill
flange, plus added a part-bulkhead in the forward upper part of the rear inner fender to reduce body flex.
Then I decided to fabricate composite panels and replace the cardboard
firewall. I also cut an opening in the underside to install a second fuel
tank.
Here are pics of some of the repair work: