The Cardboard Firewall.
I thought I'd simply copy the text from one of the dialogues on the Europa
list to this page. I received many comments from list members on what to
do with that firewall. Read on...
--- In lotuseuropa@yahoogroups.com,
"Dave" <p914gtca@y...> wrote:
> A fibreglass car with steel seats and a cardboard firewall. Sheesh!
> Having repaired or improved everything I could find wrong with
> 54/1871, I'm getting ready to roll her onto her belly again,
>except - that firewall. The designer must have laughed himself silly when he
chose >masonite to make something called a firewall. British
> humour... Anyway, mine is in good shape, but dirty and ugly.
> Shouldn't it at least be sealed somehow?
> I can sand it clean and:
> Do nothing, and let the painters deal with it.
> Coat it with marine epoxy
> Coat it with marine epoxy and a layer of very fine weave cloth.
> coat it with Polyester resin.
> Coat it with resin and glass it.
> After that a sheet of aluminum might look nice.
> What have others done?
> Thanks, Dave
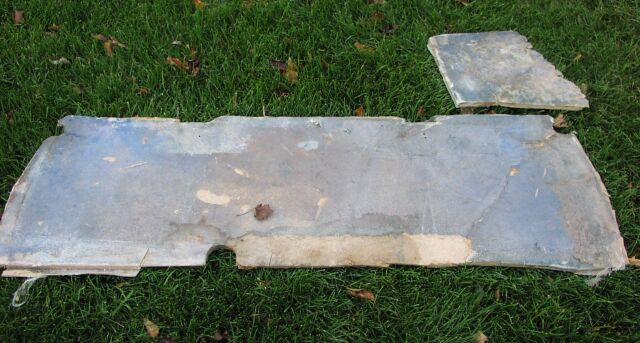
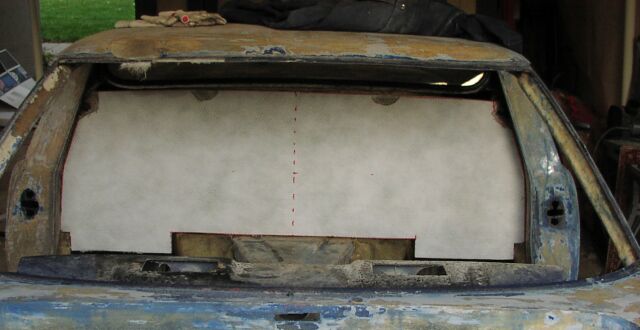
To begin at the end, I did remove the firewall, here's what it looked like.
I decided to replace it with
glass/honeycomb composite panels.
Interested in how to make the panels?
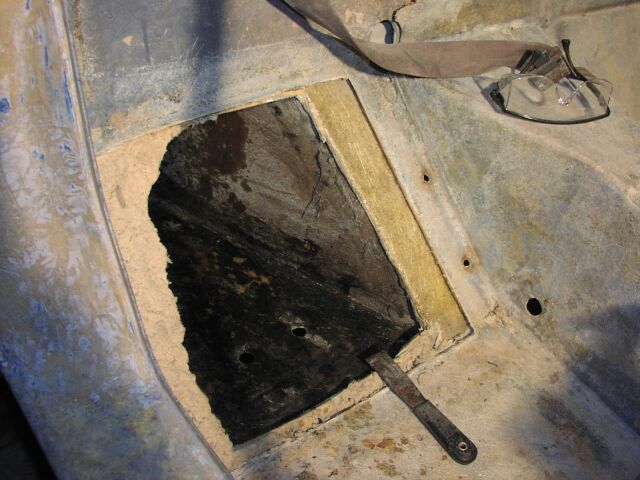
Here's one with the first beaverboard panel removed. What a
tempting storage space, or battery chamber, or subwoofer enclosure or,
or.... What should I do with it? Well, the guys on the lotus list (aka
"The collective") seemed to think that since the car will be a '
Tourer' I should install a second fuel tank. (The first in in a similar
position on the other side.) I think they're probably right.
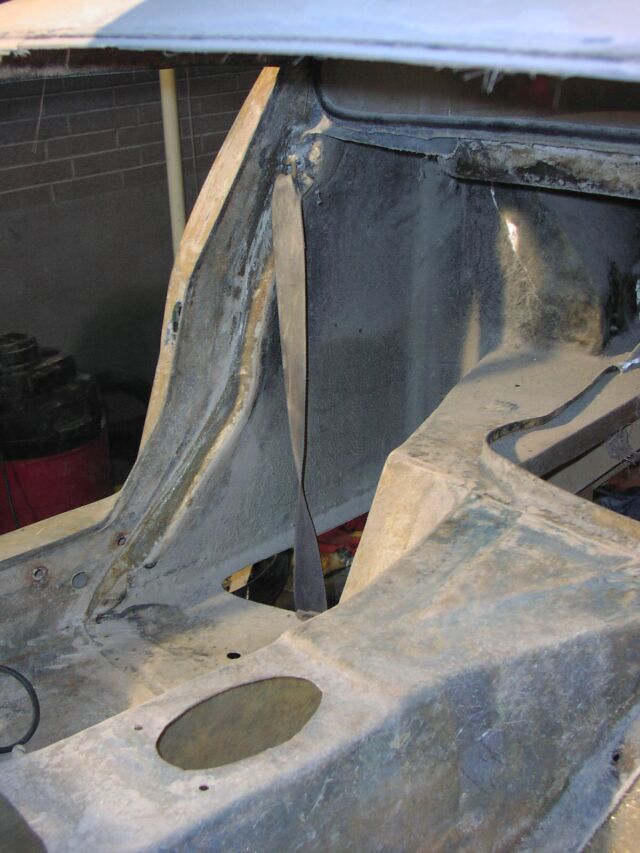
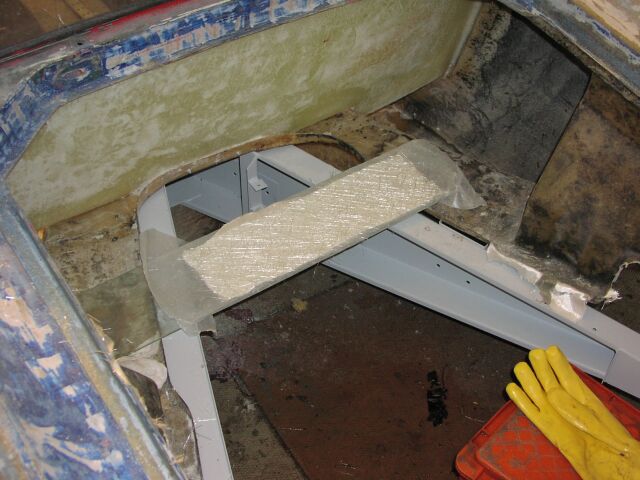
You can see how it is supposed to work. The beaverboard
panels are supposed to 'land' around its perimeter on specific areas designed
into the bottom half of the body, and onto the upper/exterior part below
the rear window, then they are glassed in place around their edges. Here you see the lip molded into the outboard side of the lower body molding
where the firewall rests after having been installed from the
inside. You can also see the flat next to the chassis box where the
inboard edge of the lower canted firewall panel rests.
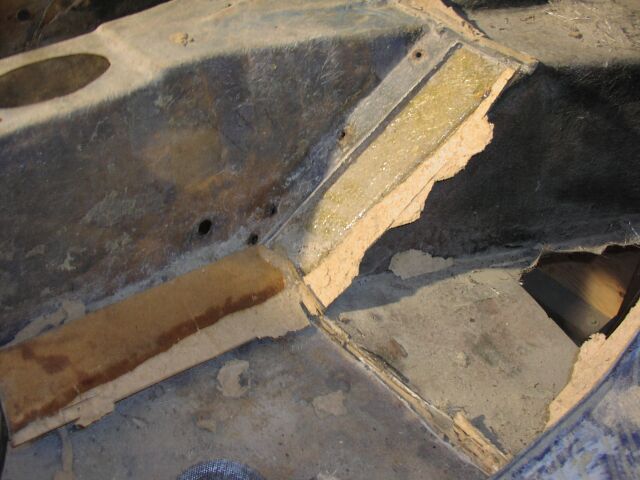
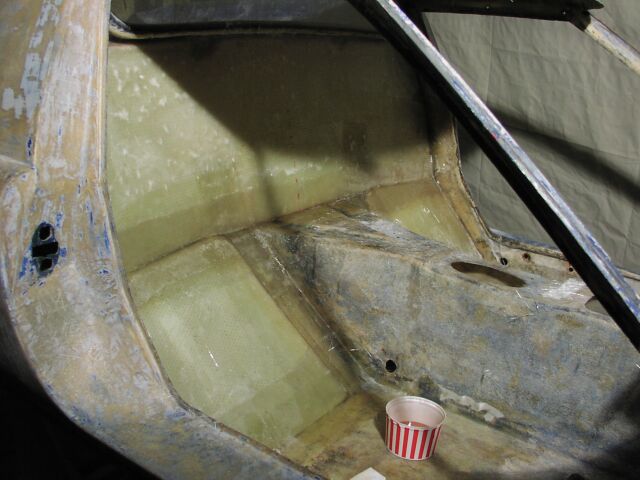
Here's where things don't quite work out according to plan. You can see
the piece of beaverboard lying on the floor. There is an immaculately
clean section of body where the board ought to have been glued in place, (beside
the three chassis bolt holes) and next to that, a ragged stip of fiberglass with
remnants of the board still attached. The lower mold isn't accurate
enough for the lower firewall panel to rest flat on the body on both sides, plus
align with the upper firewall panel. As a result, there's a large gap
where a massive joint could be. The board is only held in place on the
underside by the fiberglass mat installed from behind, No big deal,
it was all still sound, but I'll bed my composite panels in epoxy.
Then I noticed another problem, not unexpected. With the car off the
chassis and no firewall, the rear part of the floor was quite floppy and the
body shell was far from true. No problem, we put the chassis on blocks,
then the body on the chassis. It lay flat and straight. Perfect.
So, using a zip disc, we cutted and fitted the panel I made.
We then mixed some marine epoxy with silica and chopped glass and heavily
coated each of the surfaces in the car where the upper firewall would
land. After attaching the firewall from the interior with a few sheet
metal screws, (lots of pressure isn't a good idea) we mixed up some more epoxy
and laid a nice hollow fillet along those joined surfaces from the engine bay
side. Once that hit its 'B-stage', (gelled, rubbery but not fully
cured) a quick wipe with an acetone-dampened rag smoothed it nicely.
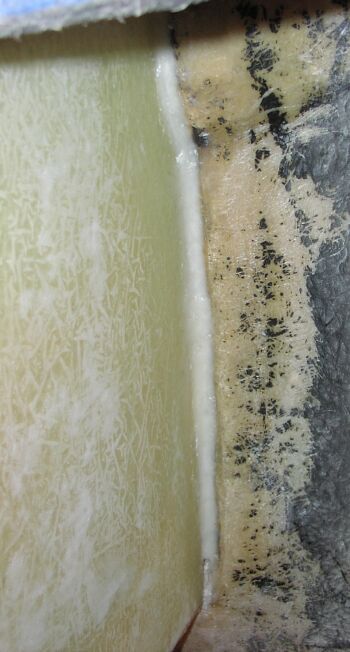
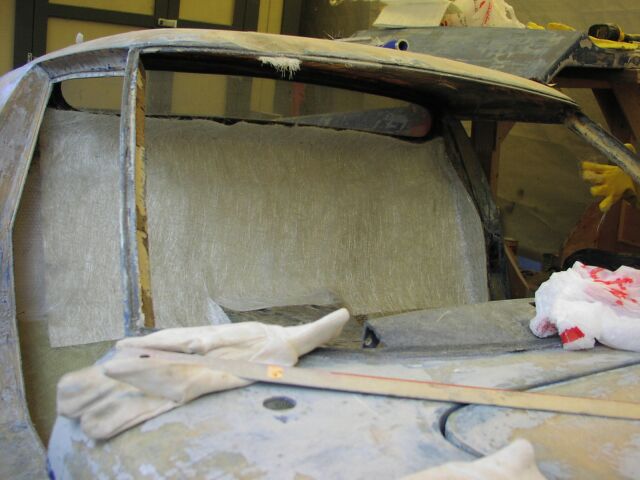
Here's a picture of the glued but not glassed firewall. The white bead
is a nice smooth concave epoxy fillet. Awesome stuff.
I'm glad that so far only one side has been fibreglassed. the board
would have been too stiff to easily install with both sides glassed. It would
certainly have distorted the narrow strip
of fiberglass below the rear window. Solid firewalls like
aluminum would be very difficult to install, and would - I think - give inferior results in
the end. Maybe other europa firewalls are perfectly flat...
Next is 'tabbing' the firewall to the body. I pre-laminated 2 layers
each of mat and cloth on a sheet of glass covered with waxed paper, then lifted
the entire (uncured) patch into place and worked the air and excess resin out
with a resin roller.
This patch will be placed over the epoxy fillet.
After having secured the firewall panel from the rear, and 'tabbing it in
from the front as well with two patches (visible in the next picture), I set
about fitting and epoxying the the lower panels in place, as was done with the
upper panel.
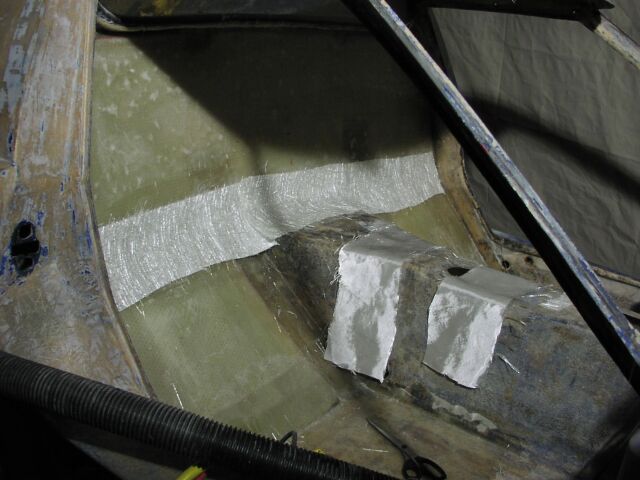
Here you can see the patches securing the firewall from the front, plus the
lower panels secured by epoxy.
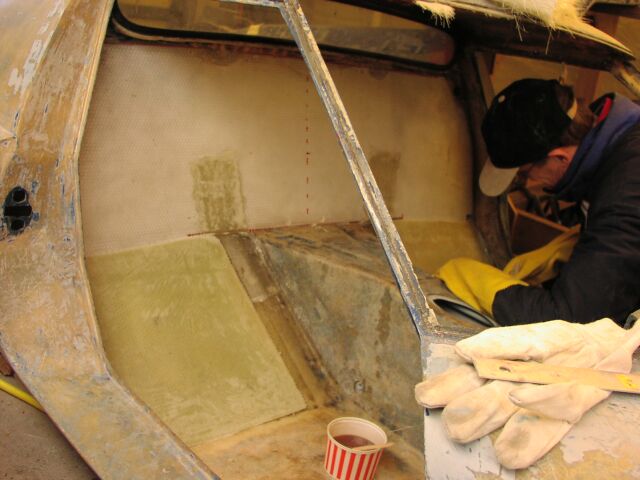
The layer of mat held in place with a few staples.
And on top of that mat, a layer of cloth was carefully installed. The
edges of the lower panels were glassed in and each joint was reinforced with layers of mat and cloth.
The car was lifted onto the stand from the chassis, and it felt no heavier -
it may even be lighter. It sure feels much more rigid than it did six
weeks or so ago...
I will close the discussion
of my firewall by observing that the results are excellent, and well worth it
for a major restoration like this one. I would estimate around 10-15 hrs
was spent and the cost of materials at around $100US. The worst part is
the dust created by grinding away the old fiberglass. Cover your
skin, wear a mask, be prepared for some irritation. Second worst part is
working on your off-hand. In my case this meant leaning into the drivers
side, and using my left hand to fit a reinforcing patch between the top of the
firewall and the bottom of the window. Then knocking over an open jug of
resin. Then dropping my last gooey brush on the floor. In a thunder
then hailstorm in November in Canada.
Reinforcing along the floor from the back was no joy either, though these
things force you to get inventive WRT installation tricks. I found that
laying up a patch on a sheet of waxed paper, then folding it over a piece of
cardboard made it easier to place into tight quarters.
At this point, I'll introduce Struan from Oz who shared some helpful pics and
instructions on making a similar firewall. He approaches some details
differently, and has made a very nice job of it.