Dave's Pages |
|
|
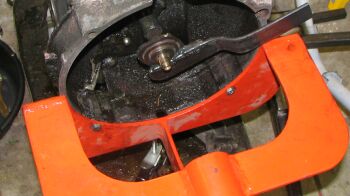
Porsche 914 Gearbox RebuildThe 914 uses the same basic gearbox (known as 901, 911, or 914) as that used by the 911 until 1970 when it was superceded by the more robust 915 box, which was used until 1987 (I think) when the G50 box was introduced. The 901 and 911 boxes are identical but for the clutch actuation method which changed in 1970, and the 914 box is very similar to the 901 box, except that it has a different shiting mechanism and is of course configured differently than the backward-turning box used in the 911. 914 boxes were available in two (914/6 and 914/4) tail shift configurations, and the better shifting post '72 side-shift. After some difficulty identifying it, (duh) I discovered my car had an original 914/6 gearbox with LSD that had been converted to a side shift. It leaked a bit, and still had the tail shift mechanism hanging from the rear housing. The rear gearbox cover had had a crack welded from an earlier failure, and the second gear synchro was failing. In fact, it was so bad that only I could really drive the car, and even I would occasionally grind the gears. Didn't take long to get fed up, and as I had no time, I got an estimate on repair and out came the box. Most folks try to find another used box, but I had anticipated the eventual need and had set aside two additional gearboxes to scavenge for parts. I started reading James' excellent web page on box rebuilds and as always, my curiosity got the better of me, and I tore down the 914/6 box and the spare sideshifter, plus a spare gearset generously donated by Rob, plus my spare tailshifter. In addition to the expected synchro and hub wear, I discovered many problems, so many in fact, they are pictured on a seperate page. TeardownOne grimy gearbox. I took this tailshifter apart to see if the bearings were OK and thus far they appear to be. I may just replace some synchros and rebuild this one as a side shifter - I won't even remove the diff. Mounting it on a stand is a big help.
Here's another shot. By the time I stripped my third box, I realized the odd special tool would be nice. This is a mainshaft lock. I just welded some flat bar to the centre hub of an old clutch disk. I knew I saved that stuff for a reason!
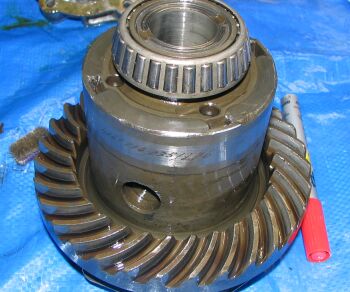
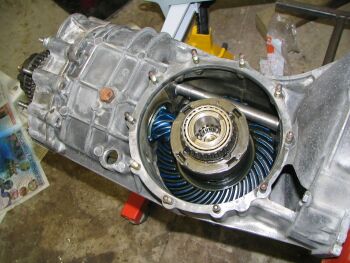
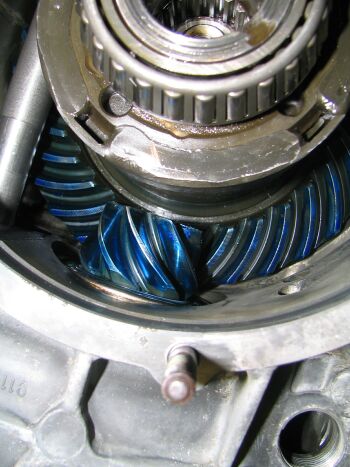
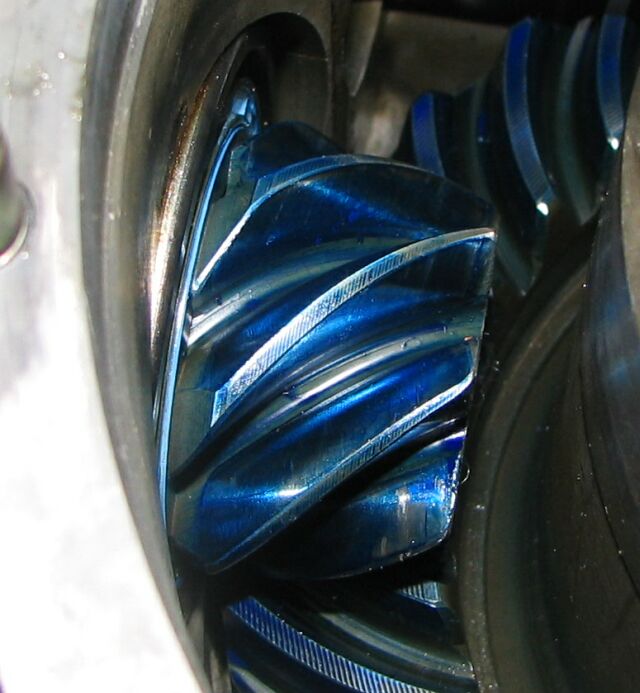
Porsche limited slip diff.
A brass hammer is really all that's needed to get the gears out of the intermediate plate, but a puller helps. You'll sleep better not whacking that expensive bearing.
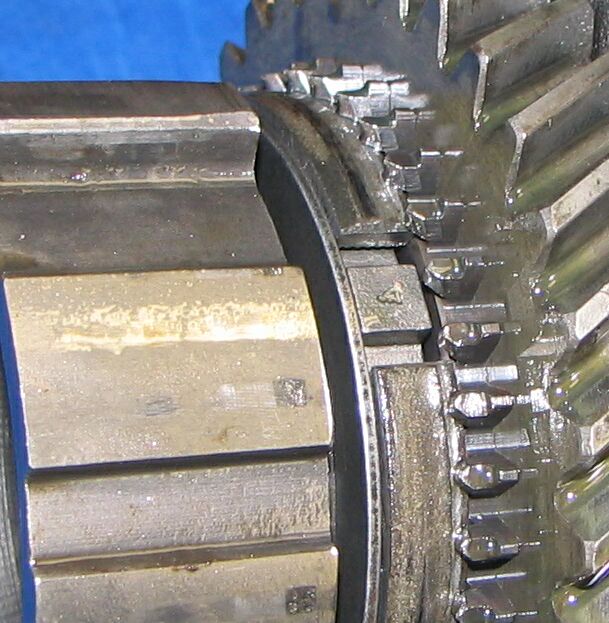
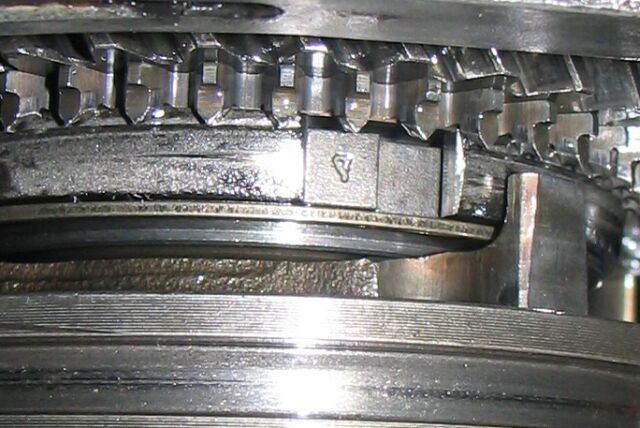
This is a pretty good pic of a worn synchro, in this case first gear. The synchro ring is the flat band that appears partially trapped beneath the pointed dog teeth. You can see that part of the synchro is polished, and part is grooved by the teeth. If you grab this one and try to turn it it will rotate under the teeth. A fresh one is ungrooved and rough looking, plus needs to be compressed to get under those teeth. You won't spin it by hand. . Which is precisely the point. When shifting, the slider (which is engaged with the mainshaft) is moved between adjacent gears (which themselves are not). Inside the slider are teeth which engage the dog-teeth on the gear you are trying to engage, thus engaging the selected gear to the shaft. Before the slider can engage the teeth it has to slide over and slightly compress the synchro ring,, causing the gear to start to spin at the speed of the slider. As the slider engages the gear the point on the teeth direct the final meshing. Neat! So, worn synchros fail to spin the gear adequately and the teeth collide while moving at different rates. ...and the rounded first gear slider dog teeth.
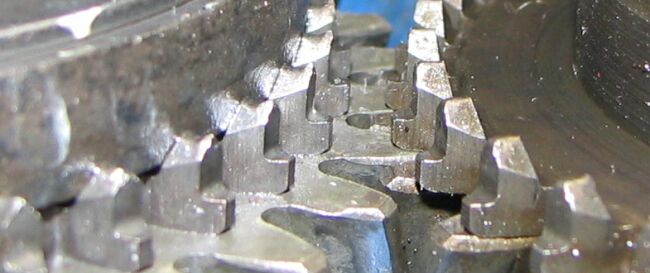
Look at the groove on the second gear side of the synchro! (top) Ah Ha! More undercut, hollowed teeth.
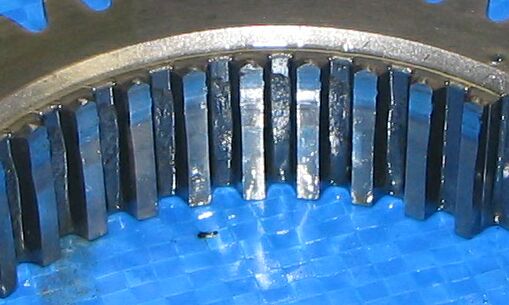
Worn teeth and nice new teeth. The wear comes from collision with the slider teeth. GRIND!
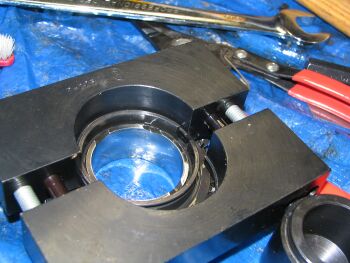
So, what I did was try to find the best synchros and dog teeth from the three gearsets. The synchro bands can be removed with yer basic tools, but the hubs really prefer a special tool. Here's the synchro hub tool in action. This thing grabs the hub securely and allows it to be pressed onto or off of the gear. The synchro hubs are the same for each gear (but first) so a donor box is a big help here, and will quickly pay for its cheap self.
Gearing?The 914/6 gears have the same first, a much taller second , a slightly taller third, the same fourth, and a shorter fifth than the 914/4. Basically the six has a closer ratio gearset from second to fifth. I created a table to determine the speeds I'd see in each gear. This is based on my 24" tire dia. and 6500rpm redline. 238km/hr ought to be fast enough....
What do you think? I'm not quite sure what to do, but it is nice to have a choice. This car is primarily for weekends, short trips and the odd track day. It might be interesting to use the second gear from the 914/6, third from the 914/4, and fifth from the 914/4. This would give a closer second and third than either car, and the tallest possible fifth. ReassemblyNow, there are three areas which must be shimmed in order to set the pinion depth and god knows what else. There is a shim stack on the pinion shaft and a stack of paper shims between the intermediate plate and gear housing, plus shims that shift the diff from side to side in the housing. Most DIY rebuilders replace synchros and simply replicate the shims when they reassemble. I wanted to use some of the 914/6 gears and LSD. The 914/6 intermediate plate was toast. I would be swapping too many parts to be comfortable doing that, plus the 914/6 box had been torn down and repaired before and I had no confidence that it had been accurately reassembled. The Haynes manuals I have don't explain how to determine the correct shimmage. STUCK! I need the factory manual or to bring the box to the dealer. Anyway, I kept at it, and ended up getting copies of the manual. Of three intemediate plate assemblies, I had only one of each type of bearing and only one plate in GC. Enough to build one box anyway, and free too. To remove or install the bearings, heat the plate to 250 deg. F. I put mine in the barbeque as Doris gave me 'a look' when I put the Renault cylinder head in the oven. (She's OK, just a little intolerant at times.) When the plate is warm, the bearing can be pressed in or out by hand When cold, you risk breaking something if you try drifting the bearing out. Ask me how I know. After I read the manual, I found that one needs a host of fancy dedicated tools to correctly set up the gearbox. I got some more help for some of the guys at the Pelican Parts BBS and kept at it. Using machinists dye to 'eyeball' the pinion depth.
|